
Easy Fall Burlap Sign

As I’ve walked my daughter out to the bus the last couple of mornings, the weather has definitely taken on a cooler edge. Fall is coming and while I love summer, I’m excited for a new season. (Not to mention hoodie weather, amiright?) I’ve packed away my summer decor and started pulling out all the fun fall decorations that bring a smile to my face. A couple years ago I spotted a cute framed burlap sign at a local store and considered buying it until I saw the price. I knew I could make something similar without spending a lot and I’m happy with how it turned out!
In August I started hosting a link party called Inspire My Creativity with a group of talented ladies. Each month we create something new that is based around a theme. This month, we chose FALL.
To make this burlap sign, you will need:
- burlap stretched across a frame or burlap placed inside a frame
- black Sharpie
- pen
- ruler
- scissors or rotary cutter
- cutting mat
- masking tape
- small piece of cardboard (optional)

I found a set of two 6×8 burlap frames at Walmart for less than $5. When I unwrapped them, I could see that there was light coming through the middle of the frame. To rectify this, I cut a piece of cardboard out that was the same width as the opening in the back but a little bit longer on one side and slid it into the space behind the frame. Problem solved!

Next, I wanted to make sure that the words would be centered. I decided on a 1″ margin all the way around which gave me a 4×6 space to work in. I used masking tape to create the border. All I had was 2″ wide masking tape so I used my cutting mat and rotary cutter to get exactly 1″ wide.

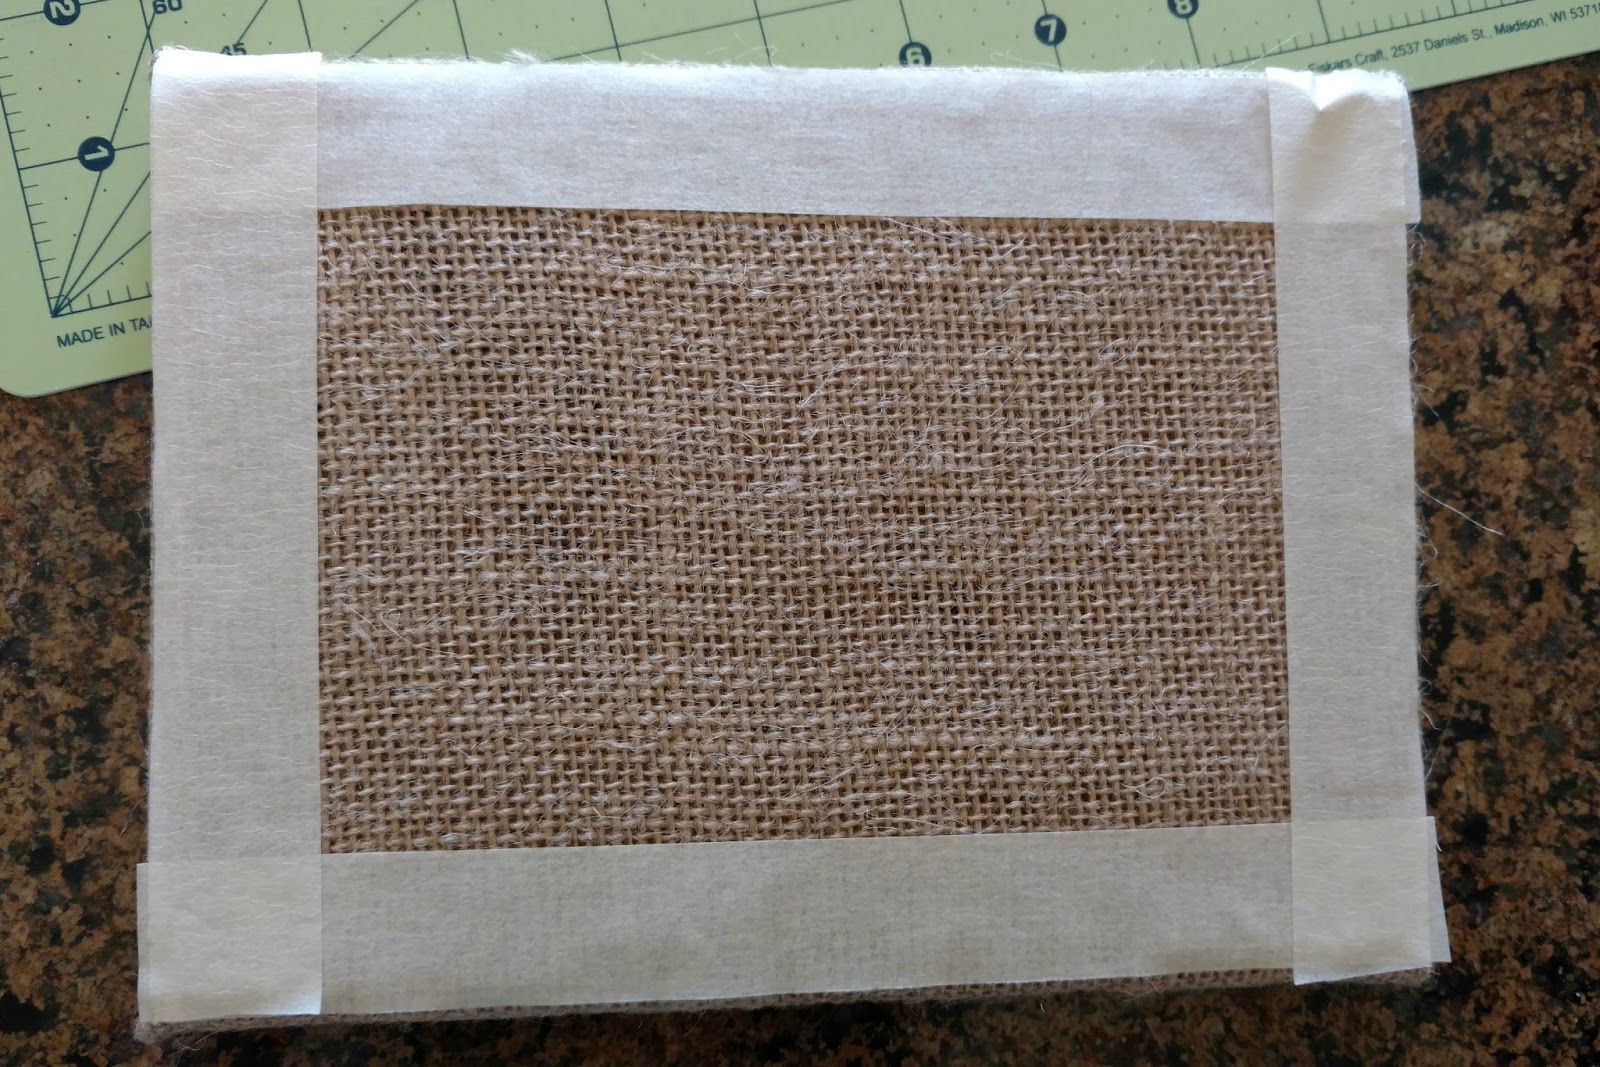
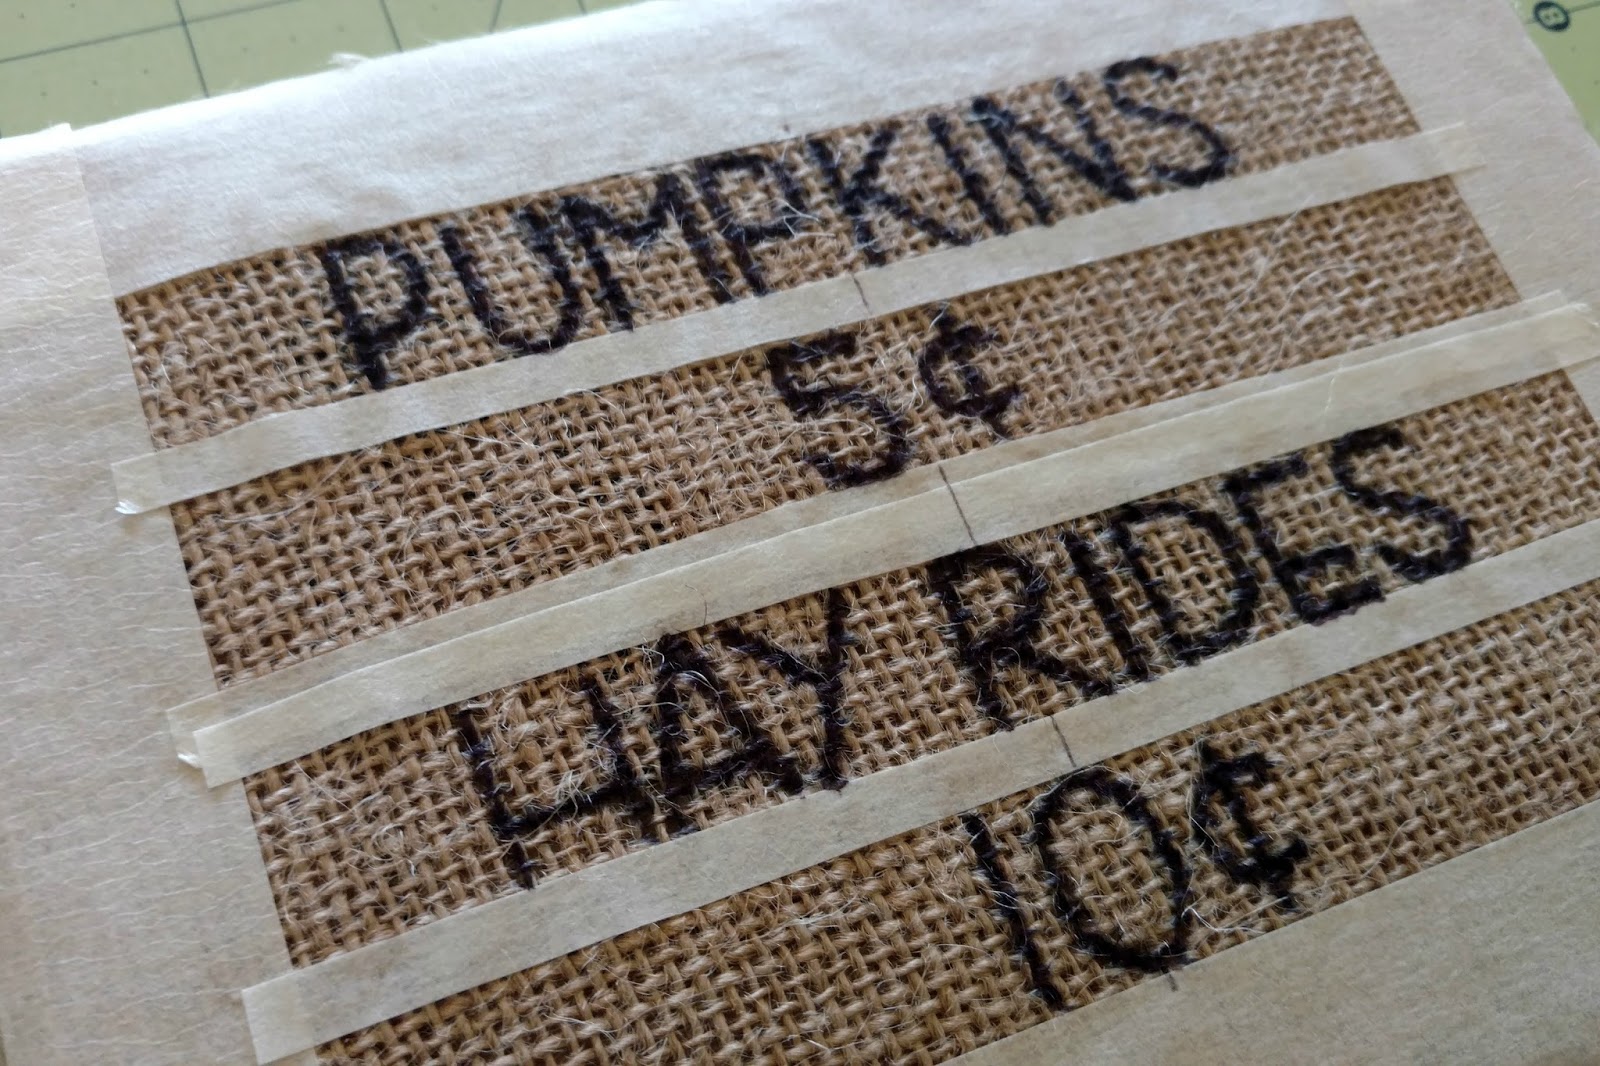
After that, I wrote down the words I wanted on my sign: Pumpkins 5 (cents), Hay Ride 10 (cents). The way it worked out is that I would need four lines of words. I wanted the words to be 3/4″ high so that I could have 1/4″ between each row. To make sure that my lines were straight, I cut more masking tape into 1/4″ strips and measured down 3/4″ and put the tape below that. When I was done, I had nice, evenly spaced rows. (Honestly, getting everything taped off was the longest part of making the sign but was definitely worth it so I had straight lines and letters the same height.)

Next, I measured the center of the space and marked it on each row of masking tape. Then I counted out the number of letters in each word(s) and circled where the middle was. From there I started in the middle of each word and worked my way out, using a pen to sketch the letters. Then I traced the words with a sharpie and removed the tape.


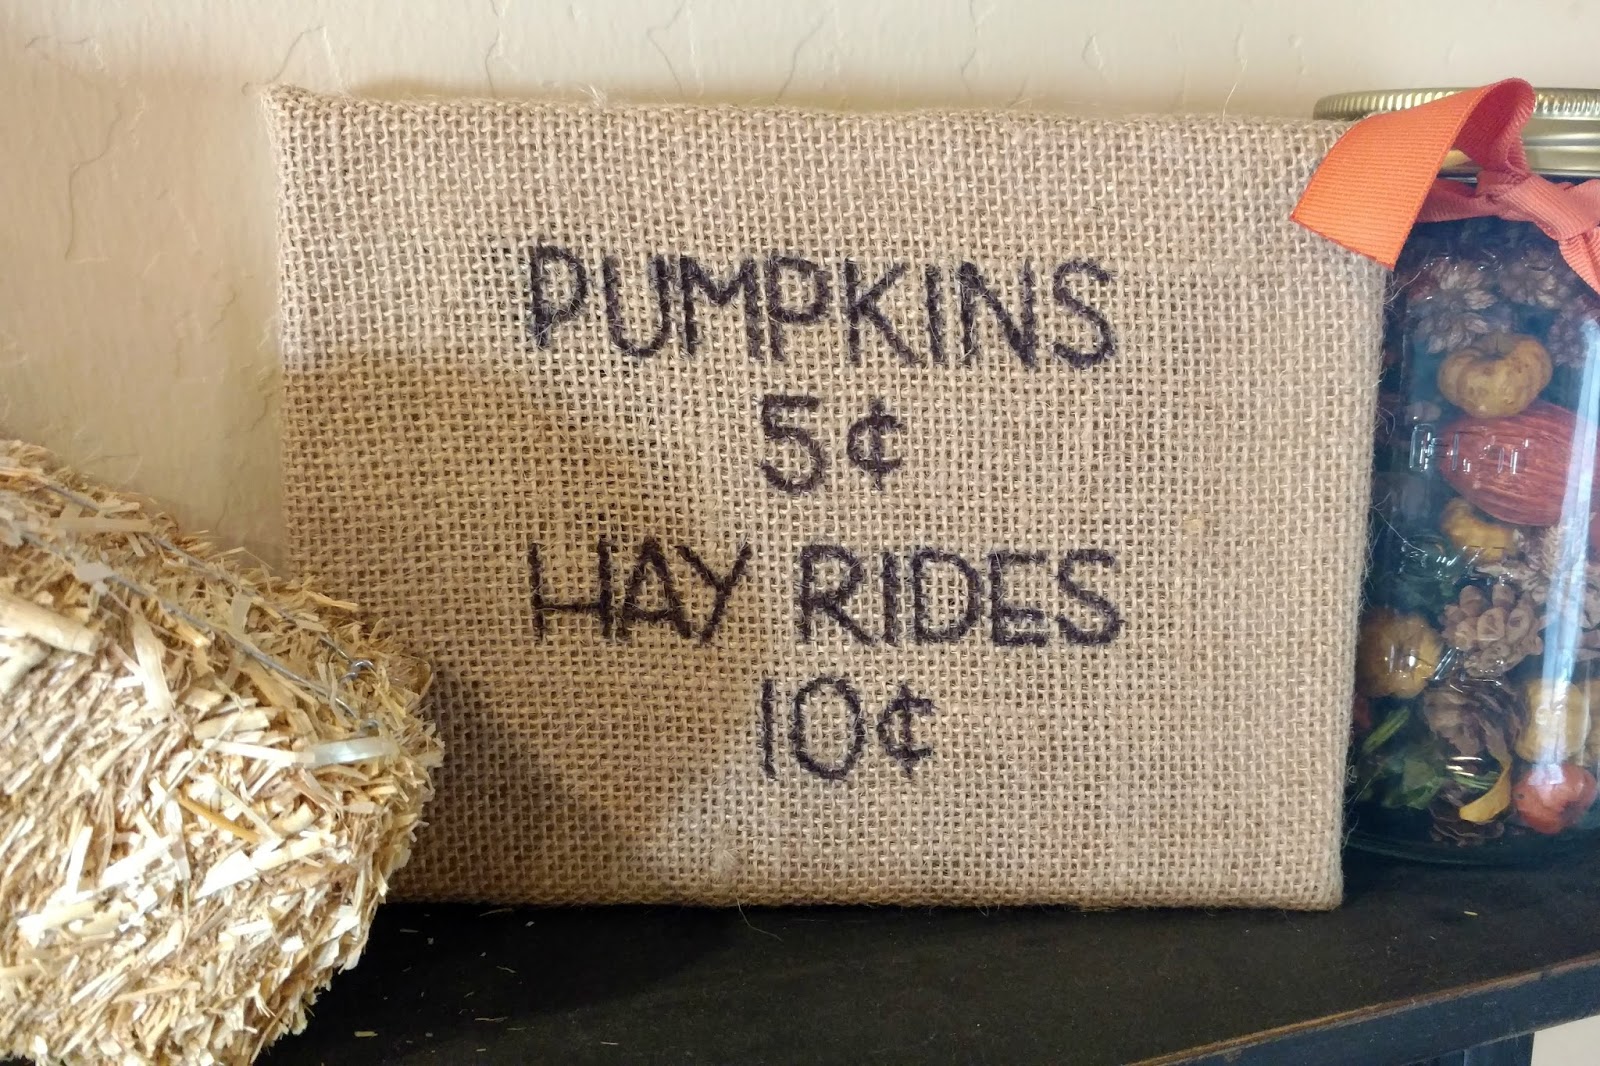
Ta-da! I love how it turned out. It’s a fun and simple fall craft for yourself, a craft night or even a gift. This is so easy to personalize with the words or style of writing. I’m thinking I might see if I can convince my husband to make a frame for me. What do you think?


As I mentioned above, this post is part of the Inspire My Creativity link party where every second Wednesday of the month, I will be co-hosting along with 12 other talented bloggers where we will be sharing a project based around a theme. You can check out each of their blogs below:

Hi! I’m Shani,
A stay-at-home mom of 4 and wife. I love sharing easy to follow craft tutorials, kid activities, family-friendly recipes, organization, travel and motherhood. I hope you’ll feel uplifted and empowered by each post, regardless of what kind it is. Join me as I raise my little munchkins and share the sunshine in this beautiful, crazy thing called life! Read more...


It looks so good! What a simple craft, but one that turns out so well! Lovely addition to the fall decor! It has been cooler here, too, which I love, but it looks like we still have a couple more really hot weeks before it officially decides to be fall over here!
What a darling project! I love how it turned out. I also love how you styled it on your shelf!
What a great ideas! I love how it's simple yet so perfect for fall! This little sign would definitely add that touch of autumn to any home!
how cute is this?! I love that it's DIY I wanna do more DIY decor for my home once I redecorate! <3 Thanks for sharing this project
This is so neat! I love crafting and I especially love burlap. I've always loved it and this gives me fresh ideas on what to do this fall. I was just thinking about decorating last night. 🙂 Beautiful work and I LOVE your blog lay out/theme.
This is so darling! What an easy and perfect DIY for fall!
Love this idea, Shani! I've never seen burlap canvas before!
That is so stinkin' cute! I love it!
How genius to put the cardboard behind the back to make it less see-through!
xoxo, SS
Southern and Style
Such a darling sign! I love how it turned out! Such a great idea to tape it off to keep things even.
Your DIY sign is adorable. I love decorating for fall and especially for Halloween!
It turned out SO CUTE!!! <3
this is such a cute and fun idea!! I want to make one!
Oh my goodness! So, SO cute and so simple too! I can't believe how easy that was to put together! I'm totally inspired to use some of my scrap burlap now, thanks!
This is so cute! I love the look of it and what you wrote on it! Perfect for fall. 🙂 I need to find some burlap and try this out.
Cute! This would make a fun stitchery too!
This is so cute. I love how simple it is, yet it adds the perfect touch to your fall decor.